| Home |
|
Intro | Gear | About |
Trips: |
2026 | 25 | 24 | 23 | 22 | 21 | 20 | 19 | 18 | 17 | 16 | 15 | 14 | 13 | 12 | 11 | 10 | 09 | 08 | 07 | 06 | 05 | 04 | UBXC | Apps | eBook |
|
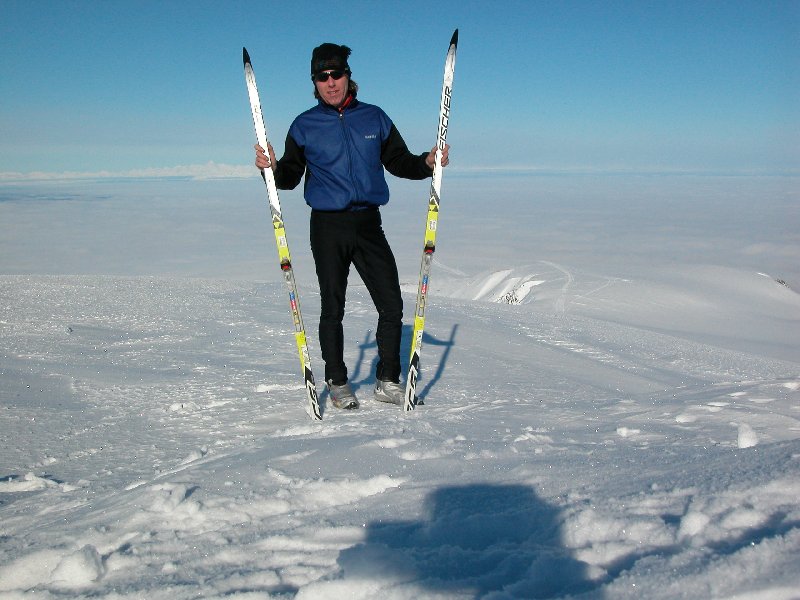
Gear Suggestions by: Tim Kelley (2012) |
|||||||||||||||||||||||||||||||
|
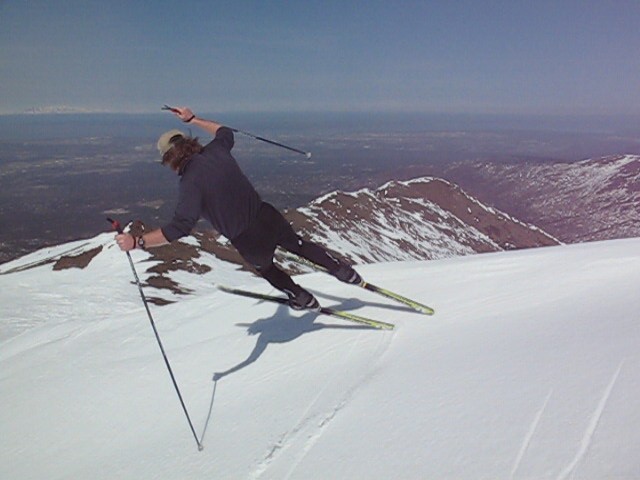
I often get emails from people asking for suggestions on ski equipment to use for crust and winter trail skiing. So ... I decided to make this web page to answer the most common questions I've received. And I've added some more tips and ideas. Hopefully this web page gives folks an idea of what equipment may be needed to get off the groomed xc trails and out ski-exploring crust or winter trails. The following information is oriented towards extended day outings. Overnight and multi-day ski treks are more gear-intensive and are not covered here. For information on how I build my single-pole skiing sleds - click here. |
|||||||||||||||||||||||||||||||
|
DISCLAIMER: I am not promoting the brands that I mention below. I am not sponsored by anyone. I buy all of my own gear. The following is my opinion for gear that works for me. That does not mean that I am right or that this gear will work for you or that there isn't better gear out there for performance backcountry skiing. What follows are merely suggestions based on my experience and my preferences. This web page is a work in progress and my opinions and ideas on gear will change over time. |
|||||||||||||||||||||||||||||||
| Skis | |||||||||||||||||||||||||||||||
|
General concept: Lower tier xc racing skis - light, responsive, durable and much less expensive than top of the line race skis. |
|||||||||||||||||||||||||||||||
|
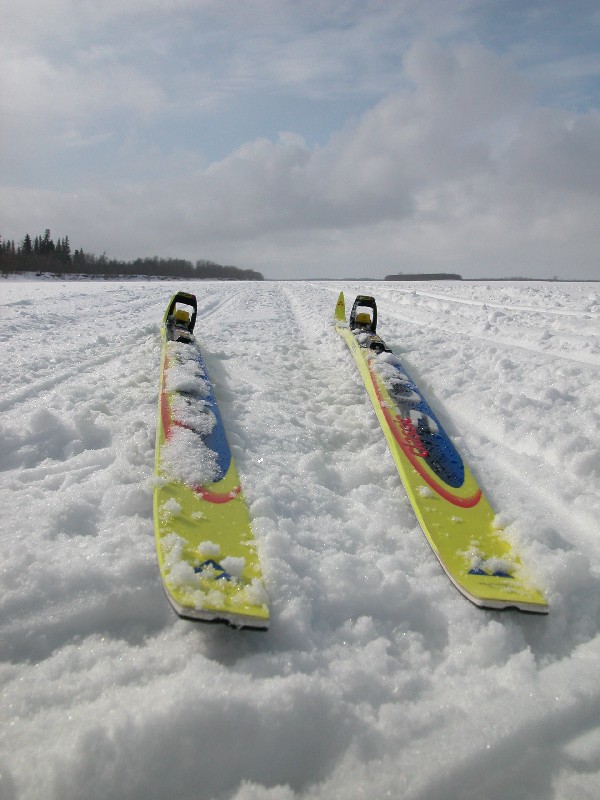
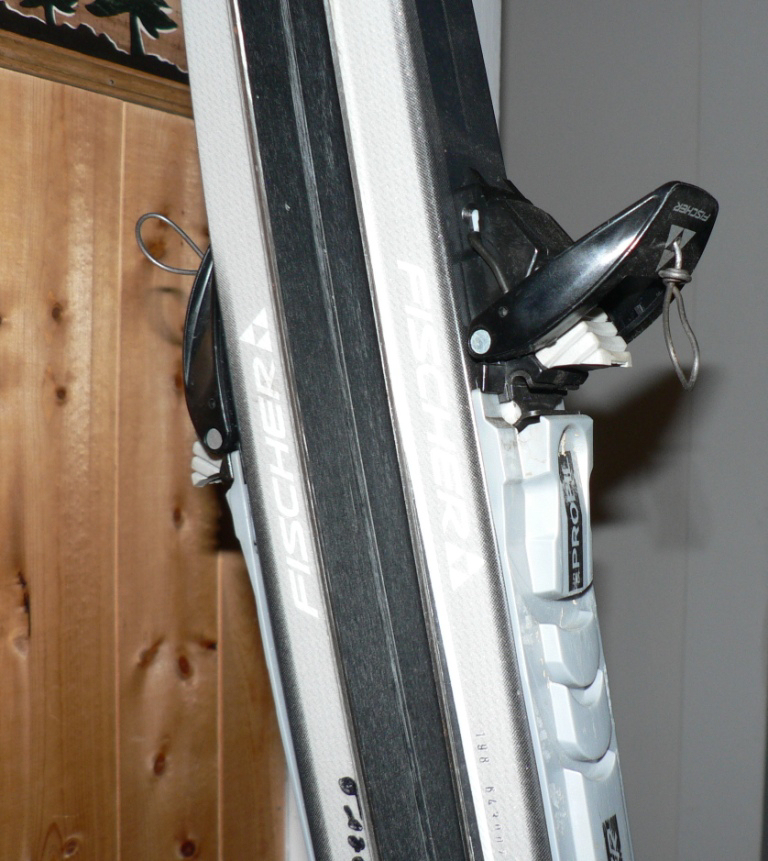
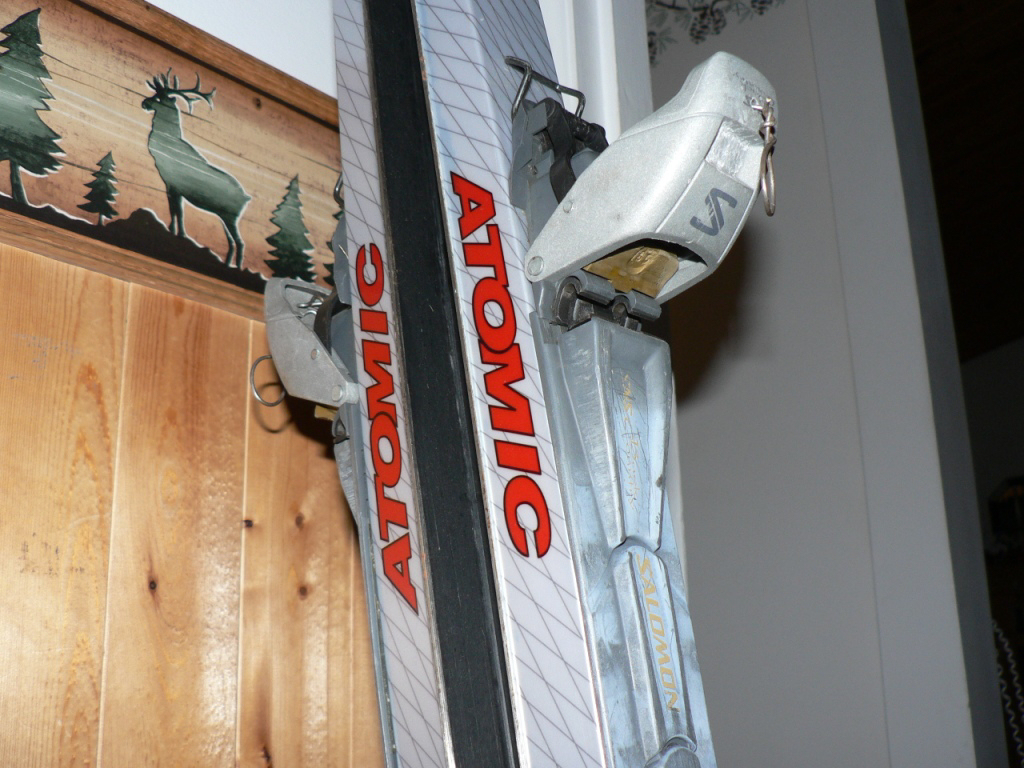
Cross country racing skis are the most fun skis for crust skiing and trail cruising. High end xc race skis are intended for impeccably groomed courses. While these skis can do fine on smooth crust and easy flowing winter trails, they are not designed for skiing rough terrain. They are fragile and expensive. Even if they do hold up, it seems a waste to run $600+ dollar skis across rocks, through compressions, bounce them off trees and skate miles of rough ice on them. So that's why I'm a fan of 2nd and 3rd tier race skis. They are good performing skis, much cheaper (around $200), not much heavier and they are stronger. I usually go with skis that have honeycomb air-cores and wood side-walls all wrapped with composites. I've had better luck with these skis not breaking than with foam or honeycomb sandwich skis. One thing I would caution against is using old foam core laminate skis, especially if you are going a long ways out. It seems that the epoxy in these older skis (10 or more years old) gets brittle over time and these skis tend to break or delaminate much easier with age. |
|||||||||||||||||||||||||||||||
|
Here are the skis I use most of the time. If you click on the ski icons below it will do a Google search for you so you can learn more about the skis. |
|||||||||||||||||||||||||||||||
|
|||||||||||||||||||||||||||||||
|
Ski fit is very important. A ski that is much too soft or too stiff for your body weight, or is too short or too long, is no fun at all. Make sure when you buy skis that they are fitted to you by folks that know what they are doing. The wax-less Fischer Superlight Crowns mentioned above only come in one flex because they are not "high performance" skis. But for the conditions (late spring and summer snow) and terrain (mountainous) I usually use them in the flex doesn't matter that much. Length of skis: For crust and snowmobile trail skiing I usually choose skis that are 10 cm shorter than I would use for racing skis. Shorter skis make skiing on narrow trails and through bush and forests easier. |
|||||||||||||||||||||||||||||||
| Boots and Bindings | |||||||||||||||||||||||||||||||
|
General concept: Comfortable, lightweight with extra support XC skate and combi racing boots and "simple" bindings. |
|||||||||||||||||||||||||||||||
|
I use Salomon boots and bindings, but I surely don't have any beef against other brands. I prefer the RS9 (Race Skate 9) boots because they are the most comfortable Salomon skate boots that I've used. By comfort I mean that your feet still feel good after a long day of skating on rough snowmobile trails. I also like the fact the RS9's have breathable nylon uppers. You're feet don't get clammy like they do in the vinyl finished uppers of current high-end Salomon racing boots. However, they don't make the RS9 anymore, now the Salomon RS Carbon has replaced it. And, sadly, the RS Carbon does have the vinyl coated uppers. My favorite Salomon boot of all-time is the RS9 "Bumble Bee" boot. These were made in Romainia and were stiffer, more comfortable and more rugged than latter Salomon RS9 boots. They are ugly for sure, but they are likely the best fitting boot Salomon ever made (again, in my opinion). For classic and combi skiing (when you mix classic and skating techniques during the same trip) I use the Salomon Pro Combi. I like using combi boots on rough winter trails (like snowmobile trails) for the extra support when classic skiing. The problem with the Pro Combi in my experience is that it takes the soles a long time to break in so that classic skiing becomes comfortable in them. The break-in period is painful, and seems to take way too long. But once the boots are broken in, they are pretty good. They do however get clammy on long skis or on really cold days due to the vinyl skin that doesn't breath on the uppers. |
|||||||||||||||||||||||||||||||
 |
 |
||||||||||||||||||||||||||||||
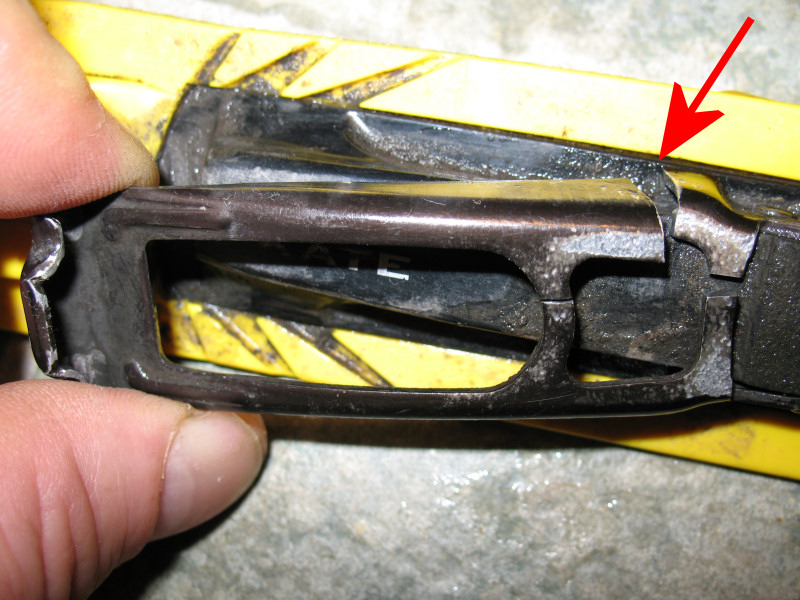
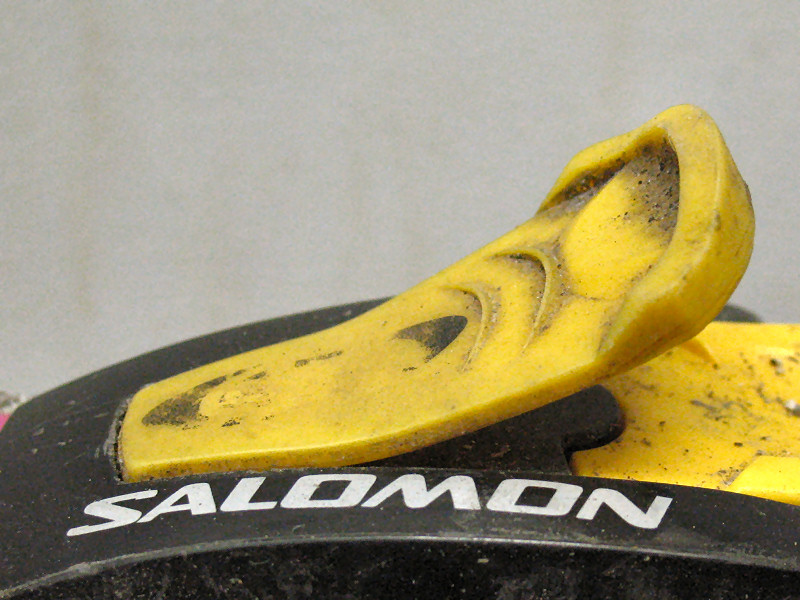
| Salomon Pro Combis: 90% of the time these are the ski boots I use for backcountry trail skiing. | Left to right: Salomon RS9, Salomon Pro Combi, Salomon RS9 "Bumble Bee" boot. | ||||||||||||||||||||||||||||||
|
|||||||||||||||||||||||||||||||
| Poles | |||||||||||||||||||||||||||||||
|
General concept: Second tier racing poles with classic straps. Pole length can be same for both classic and skate techniques. |
|||||||||||||||||||||||||||||||
|
As with skis, I use 2nd tier poles for crust and winter trail skiing. Such poles are often called "Team" poles. They are a slightly heavier than full-on race poles, they might be a bit stronger and they cost a lot less. I've had really good luck with Swix CT2 Team poles. I've been getting 3-4 years out of a pair while skiing all winter and roller skiing all summer with them. I cut the poles to half-way between skate and classic length. That way the poles work for both techniques, as often while on a trail skiing you will switch techniques, between classic and skating, depending on the trail conditions. I also like the fact that Swix poles have larger baskets than Exel poles. Tiny baskets allow poles to break through the snow and increase the likelihood of pole breakage. |
|||||||||||||||||||||||||||||||
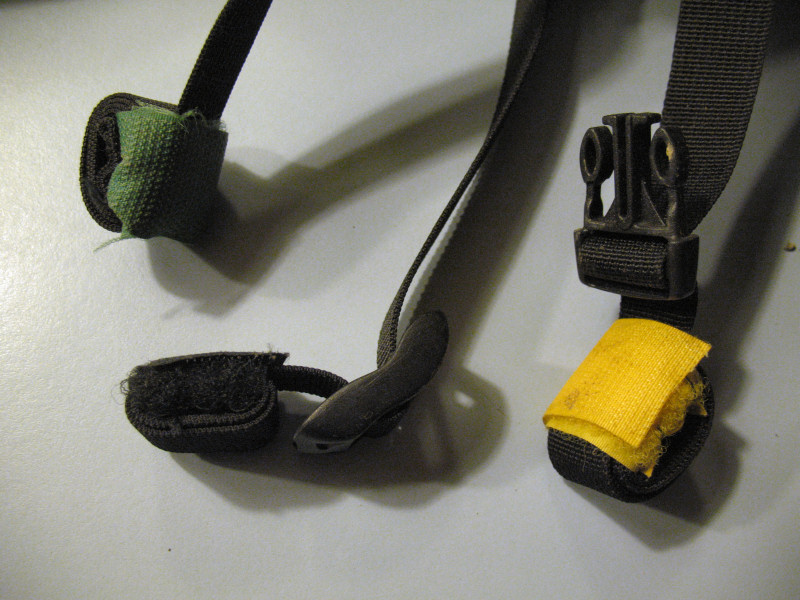
|
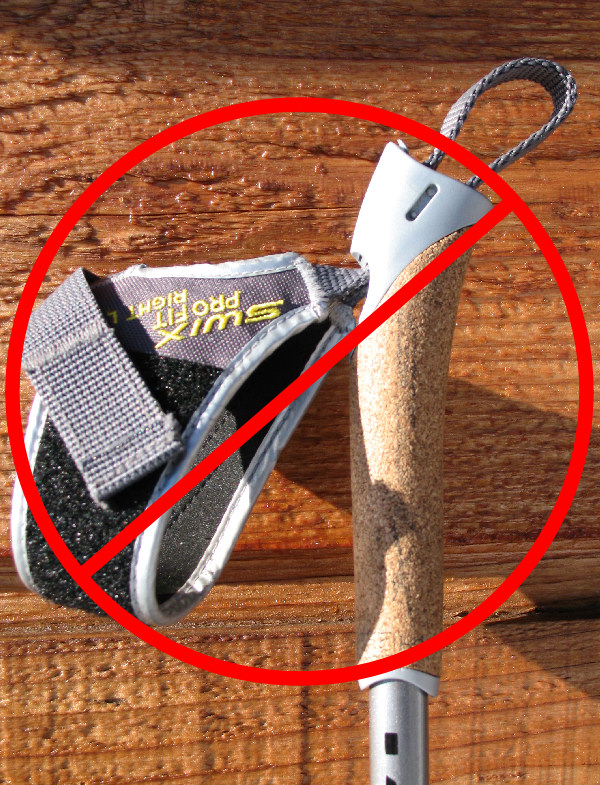
I use classic ski pole straps. I DO NOT use wrap-around straps (like the straps shown above). These are very inconvenient on long skis. They are a hassle to get on and off and they are very dangerous if you should have the misfortune to break through ice. In this case your hands, that your life depends on, are not available because they are strapped to your poles. Classic straps also allow easier use with various glove sizes. Try getting lobster mitts in and out of wrap-around straps when it's 20 below and you will know what I mean! I also do not use cork grips that come with the poles. Cork grips are too fragile and they break down and chip apart really fast. I use plastic grips instead. |
|||||||||||||||||||||||||||||||
 |
 |
 |
|||||||||||||||||||||||||||||
|
For safety, ease of getting poles on and off and durability, this is the strap and grip set-up I use. |
These grips are great for track skiing. But the wrap-around straps are dangerous if you go through ice, and a pain to deal with (try getting them off fast when a moose is charging you!!). Cork grips don't last very long either. |
Frequently check your ski pole baskets for stress fractures, so that this doesn't happen to you when you are skiing in a remote location. | |||||||||||||||||||||||||||||
| Clothes | |||||||||||||||||||||||||||||||
|
General concept: Clothing needs vary widely with the weather. Always carry a clothing "safety bag" in case the unexpected happens. |
|||||||||||||||||||||||||||||||
|
Clothing is a personal choice area and there are a lot of decent performance skiing clothes on the market. I personally like to wear lightweight, air-permeable "training" jackets over zip-front fleece shirts. For pants I look for ones that are wind-proof, that shed snow and don't catch the wind. Recently I have been using Sugoi Firewall Tights which are warm (you don't need long underwear unless it's really cold) and they are rugged. For super cold days I bring along a North Face down parka and Toko/ Mammut fleece-lined pants with wind resistant fronts and full-length side zippers. For backcountry trips of any substantial length I bring along a clothing "safety bag". The idea behind the safety bag is that if you fall through ice and get completely soaked, you have a full set of dry clothes. And the clothes are dry because they are stored in a dry bag. The second purpose of this bag is to provide extra clothes in case they are needed due to changing weather conditions. |
|||||||||||||||||||||||||||||||
 |
 |
||||||||||||||||||||||||||||||
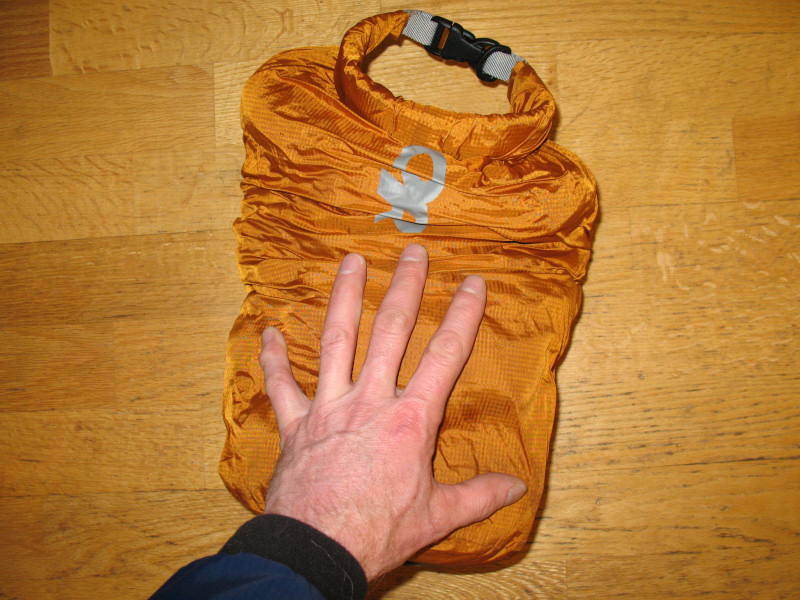
|
Contents of my clothing "safety bag" (clockwise from
far right): Go-Lite wind jacket, fleece balaclava, Thor-Lo Mountain
Climbing socks, Seal Skin waterproof socks, Patagonia Thermolite
mittens, Marmot stretch fleece tights, heavy fleece shirt, dry sack,
Marmot wind pants. Why carry waterproof socks? If your boots go under water and you want to change your socks, your socks will immediately be wet again when you put your feet in your wet boots. In this case, waterproof socks over dry socks will keep your dry socks dry. |
All the gear shown to the left fits into a lightweight dry / compression sack. I keep this safety bag in my backpack. On some trips I never open it. But you have everything with you should you need a complete change of clothes in an emergency. | ||||||||||||||||||||||||||||||
 |
 |
||||||||||||||||||||||||||||||
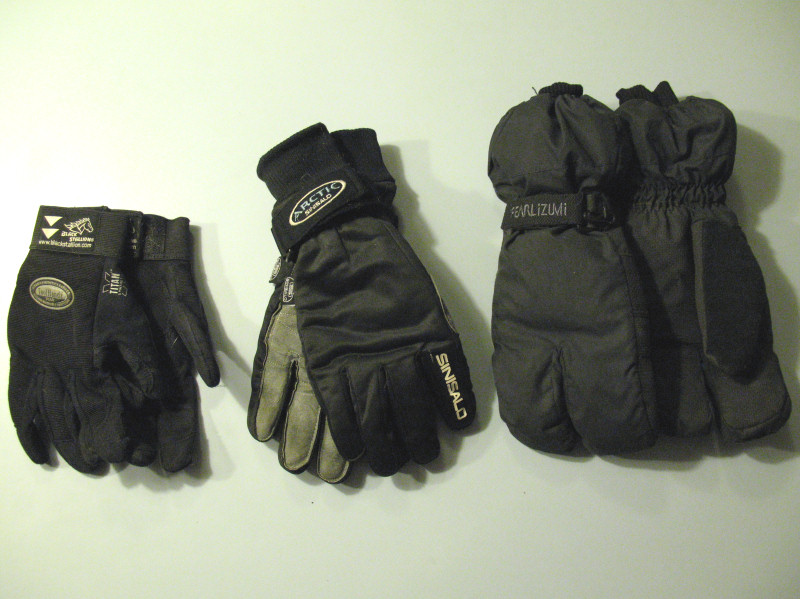
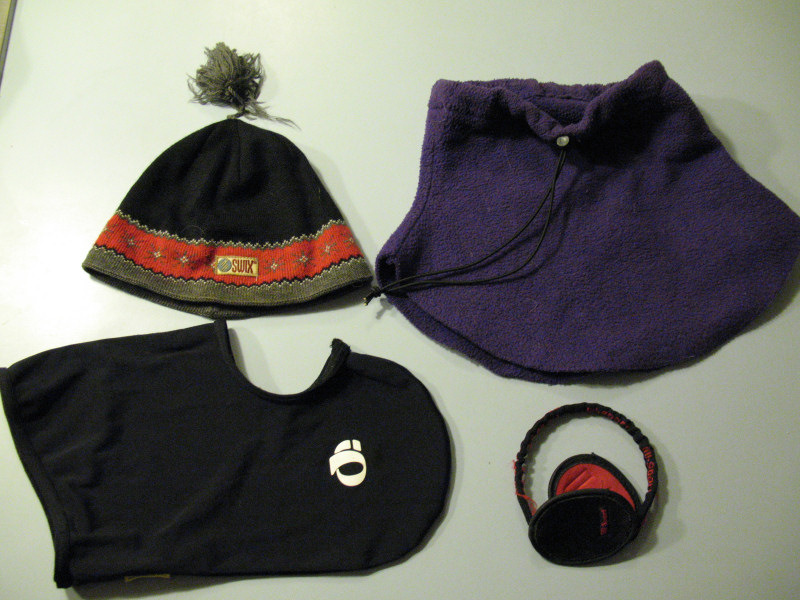
| If you ski in a wide variety of temperatures, you will need an arsenal of hand gear. Here are my staples: For sub-zero F - Pearl Izumi lobster mitts. These are great! Once you get them into your pole straps, leave them in the straps. Just pull your hands out of the mitts when you need to. For 0 F to 15 F - Sinisalo, Pearl Izumi or Manzella gloves with Thinsulate insulation. For above 15 degrees F - my all-time favorite skiing gloves: Black Stallion Tool Handz Plus work gloves! | Likewise with headgear, you will need a number of items to cover all the temperature ranges. Besides nordic ski hats, I use Swix ear warmers a lot. Thin balaclavas that fit under your hat and over your ear warmers help protect your face from cold winds. The purple fleece item pictured above is a custom made neck warmer. I've used these for a long time. You can pull them up to or over you nose and secure it with a slide-lock on a bungee cord. Great for sub-zero F skiing. | ||||||||||||||||||||||||||||||
|
|||||||||||||||||||||||||||||||
| Packs | |||||||||||||||||||||||||||||||
|
General concept: Small packs for short trips, large packs for long trips or extreme cold. |
|||||||||||||||||||||||||||||||
|
|||||||||||||||||||||||||||||||
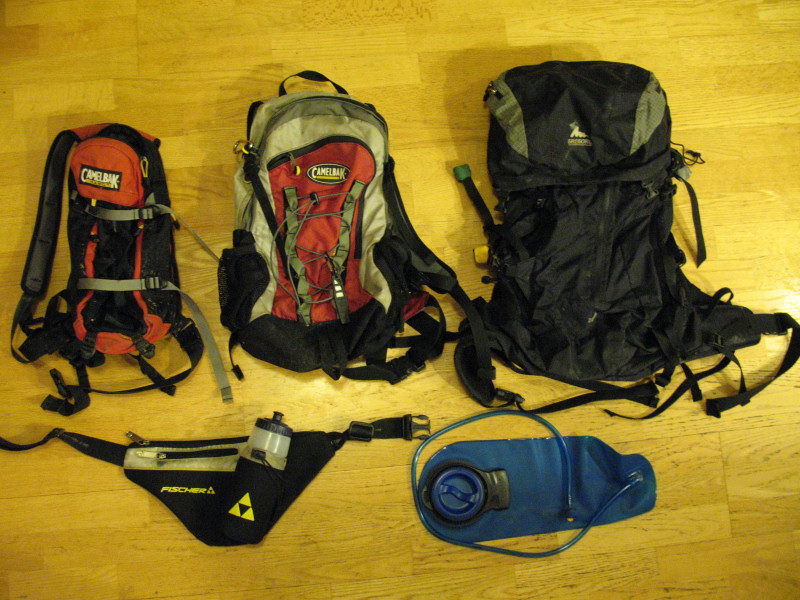
|
The above picture shows packs that can be used for varying ski trip lengths. For short trips, like crust skiing out of Glen Alps in Anchorage, AK for an hour, a drink bottle holder belt is all that is needed. Various size Camelback packs might be used for longer crust or trail skis. For cold weather outings where you bring along more clothes and food, a small to mid-sized mountaineering/hiking pack fits the bill. I use Camelback bladders for hydration. They are great most of the time. But they also seem to have a tendency to fail (nipples or shut-off valve rip off or bladder starts leaking) at the worst possible times. I don't use the drinking tube insulators. The reason is ... if the tube freezes you can't thaw it out with the insulator on. On cold days I blow the fluid back into the reservoir after each drink. And if the tube does freeze I stick down the back of my neck to thaw it out. If that doesn't work I put the bladder under my shirt next to my chest for a while. |
|||||||||||||||||||||||||||||||
 |
 |
||||||||||||||||||||||||||||||
|
Most every pack can be improved a bit. Above you can see that I sewed velcro wiring cable wraps on the ends off long pack straps. This allows you to roll up and shorten the straps so they don't whip you in the face in high winds. Pack zippers are notorious for creeping open. Using a clamp to ensure they remain closed can save you lost gear. |
|||||||||||||||||||||||||||||||
| Emergency Gear | |||||||||||||||||||||||||||||||
|
General concept: Be prepared for gear breakdowns, and the unexpected. |
|||||||||||||||||||||||||||||||
 |
|||||||||||||||||||||||||||||||
| Some basic emergency repair gear you can bring is: duct tape, a Leatherman tool and wire. | |||||||||||||||||||||||||||||||
|
|||||||||||||||||||||||||||||||
|
|
|||||||||||||||||||||||||||||||
|
Consider bringing ice self-rescue picks if you are skiing on rivers or lakes. The kind shown above are handy. You can wear them around your neck and they are readily available if you need them. Hopefully you will never need them ... but you never know. |
|||||||||||||||||||||||||||||||
|
If you are really safety conscious, then you should bring along survival essentials besides what has been mentioned above: items to start a fire, an emergency space blanket or lightweight bivy bag, additional clothes to survive a night out. |
|||||||||||||||||||||||||||||||
|
Communications: Always tell someone where you are going and when you expect to return. Leave a map of your route with this person. Bring a cell phone if you know it will work where you are. If you are going to remote areas consider satellite communication options like a SPOT locator beacon or a satellite phone. But beware, satellite communications devices are of no use if you are in a deep gully and no satellite signal can be obtained. |
|||||||||||||||||||||||||||||||
| Food | |||||||||||||||||||||||||||||||
|
General concept: Whatever your preference is, but make sure you bring enough. |
|||||||||||||||||||||||||||||||
|
If I'm on a long crust or trail ski, my staple food is Cliff Bars. I buy a box at Costco now and then and save them for use on ski trips. For cold weather trips I also bring along sausage sticks and cheeze. Calories of fat sure warm you up in sub-zero F temps. For fluids I usually just bring along water in my Camelback. Drink mixes are great ... but I hate cleaning Camelback bladders and sugary drink mixes cause Camelback bladder slime and mold to flare up much faster than straight water does. |
|||||||||||||||||||||||||||||||
| Electronics | |||||||||||||||||||||||||||||||
|
General concept: Batteries are the critical element in the winter. If all of your electronics use the same battery type you have more power options. |
|||||||||||||||||||||||||||||||
 |
|||||||||||||||||||||||||||||||
|
I'm a believer that all of the electronics you carry should use the same type of batteries. AA Lithium batteries in particular. These batteries are the best in cold temperatures. With the same batteries in all electronics you can swap batteries if necessary. If your headlamp is running low, you can steal batteries from your camera. If your GPS is low on battery power, you can swap batteries in from your headlamp or camera. Even with this flexibility, I usually bring along 4 extra Lithium AA batteries. Note: I also use rechargeable AA batteries a lot for my headlamp because they are cheaper. Sometimes I will start a ski using AA rechargeables and switch to Lithium AAs only if the rechargeables start to fade. I use the highest amperage rechargeables I can find - like Engergizer 2450 mAh AA batteries. I never use rechargeables in my GPS or camera, just the Lithium AAs. LED headlamps are the way to go. When the Luxeon lamps came out a few years ago, LED headlamps finally had enough beam reach so you could ski full speed downhill and not outrun your light. LED lamps have a tremendous life-span, so there is no need to bring spare bulbs anymore. If you are worried about a headlamp failing, just bring another headlamp. I've bought Luxeon K2 LED lamps at Costco for as little as $16.00. And of course, the best thing about LED lamps is their long battery life on AA batteries. The bad thing about LED headlamps, in my opinion, is that they strobe at lower frequencies in the dimmer, battery saving settings. That is not a problem ... unless it is snowing. Snowflakes falling through a strobed LED light become a dotted moving lines of white. After a few minutes of viewing this abnormal light strobing you may start getting a headache. I sure do. A note on headlamp switch button sizes: Various headlamp manufacturers use different sized switched for turning the lamp on and off and adjusting the light intensity. Small buttons make turning the lamp on and off difficult when you have gloves on. Larger switch buttons take care of this problem. But ... with larger buttons it is easier for the headlamp to get turned on when it is in your pack and the switch is bumped when you are rummaging around in the pack. Or the switch can get set to on if it bumps into something else in you pack when you are traveling. Your headlamp batteries don't last very long at night if your headlamp has been on inside of your pack all day. Personally - I prefer small buttons on headlamps. They are a pain to turn on and off with gloves or mittens in the cold. But they don't accidentally get turned on inside your pack and burn your batteries down. As far as cameras go, you have to ask yourself ... what are you willing to carry? I would like to document my ski trips with a DSLR with great optics. But these fine cameras weigh pounds. So I probably would frequently leave it at home instead of lugging it along. The result would be that I'd take a lot less pictures. The compromise I choose is to use a good quality compact camera. I keep it on my pack belt in a small pouch (see above). It's always handy, so when I want it I don't have to pull it out of my pack. I just zip open the case and instantly I'm joe-photo-dude! I've been using the Canon A640 for a few years. It's a 10 meg camera that takes quality pictures and I use it a lot for making skiing videos. And the big plus about this camera is that it uses AA batteries. So I can use long lasting, cold indifferent lithium AA batteries in the camera. |
|||||||||||||||||||||||||||||||
 |
|||||||||||||||||||||||||||||||
|
Bring a map. Maps never run out of batteries. Maps also start up faster than a GPS. Often I navigate with a map I keep tucked inside the front of my jacket and only use my GPS to occasionally verify my position and to check my rate of travel and distance traveled. Another reason I bring a map is because the Garmin "MapSource" maps that you can download to map GPS's have very poor resolution for Alaska. The contours are about 165 feet apart, which is close to useless if you are traveling in hilly or mountainous terrain by skis or foot. The GPS shown above is the Garmin 60CS. |
|||||||||||||||||||||||||||||||
| Night Safety | |||||||||||||||||||||||||||||||
|
General concept: Be seen. |
|||||||||||||||||||||||||||||||
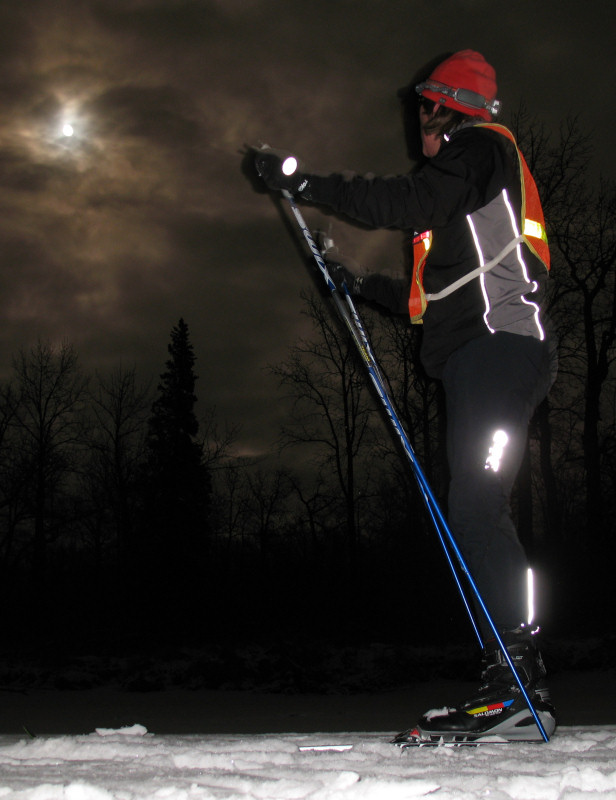
|
If you are skiing on winter trails at night, especially those trails shared by motorized users, make sure that others can see you in the dark. Reflective clothing and flashing lights, in addition to your headlamp, will alert others to where you are so they can avoid hitting you. Some folks flash their headlights at on-coming snowmobiles to alert them. This is NOT an effective safety technique. To a snowmobile driver, a flashing skier's headlamp 100 yards ahead can look just like a another headlight 1/2 mile away of a snowmobile bouncing over bumps in the trail. So the snowmobile or ATV driver may not slow down. It's better to make sure your reflective markings and lights do not look like anything else that has a motor out on the trail. |
|||||||||||||||||||||||||||||||
 |
 |
||||||||||||||||||||||||||||||
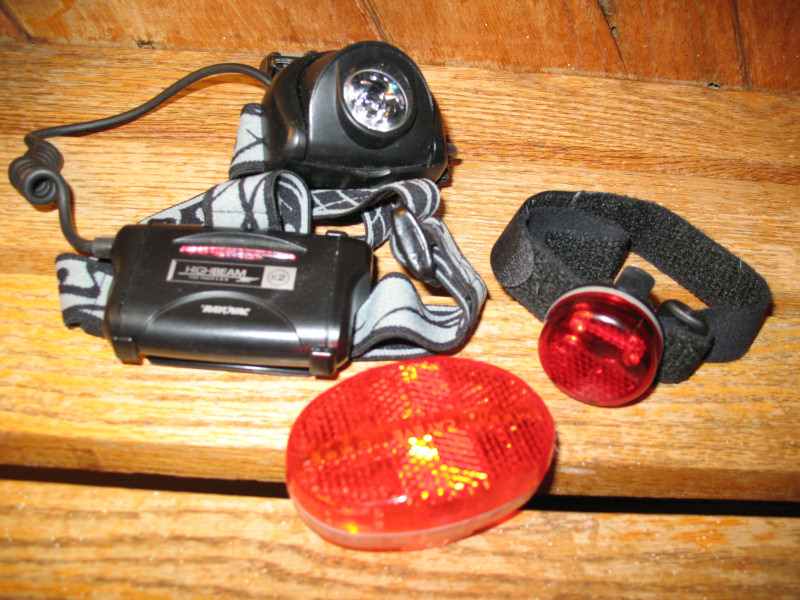
| Clothing with reflective accents, along with wearing a reflective vest, will make you "light up" when headlights hit you. Make sure that you have reflective markings fore, aft and on both sides. And be aware that wearing a pack will cover a vests back reflective band. So you should add something reflective to the back of your pack. | Flashing LED lights make you stand out. Some headlamps, like the Ray-O-Vac pictured above, have a built in LED rear-flasher. You can also use bike flashers like the Cateye one above that runs on two AA batteries. My favorites are the small LED flashers that run on watch batteries that you can strap onto your arm with a Velcro strap. They are easy to turn on and off and you can rotate them forward or back depending on what direction you hear snowmobiles coming from. | ||||||||||||||||||||||||||||||
| Other | |||||||||||||||||||||||||||||||
|
General concept: Odds and ends ... |
|||||||||||||||||||||||||||||||
|
Wax and waxing cork, if you are classic skiing. Wax scraper. Silicone wipe wax for fishscale skis on summer snow. |
|||||||||||||||||||||||||||||||
|
Sunscreen |
|||||||||||||||||||||||||||||||
|
Money for post ski trip stop at Coast Pizza in Girdwood, AK. Or your favorite food-fix stop in your area. |
|||||||||||||||||||||||||||||||
|
NO iPODS! - You can't hear snowmobiles approaching. |
|||||||||||||||||||||||||||||||
|
Eyewear: As my friends know, I am always going on about what a good deal modern day safety glasses are for xc skiing, or anytime you need sunglasses or eye protection. Why pay $150 for a pair of Euro-shades when a $5 pair of safety glasses will do the same job (especially when both glasses were probably made for $1 each in China)? I usually buy a bundle of 4 to 6 safety glasses and this will last me a few years. I get dark shades for sun, amber shades for night and flat light skiing. I put Croakies on them so you can flip them up or down when you are skiing. It's no big deal accidentally scratching or losing a pair of 5 dollar safety glasses, just break out a new pair. In Anchorage, AK - Alaska Industrial Hardware most always has a really good selection of light and sporty safety glasses. |
|||||||||||||||||||||||||||||||
 |
 |
||||||||||||||||||||||||||||||
|
For more gear information and reviews, peruse the blog section of this web site. |
|||||||||||||||||||||||||||||||
|
|
|||||||||||||||||||||||||||||||
| Great Tips and Ideas from Other Skiers ... | |||||||||||||||||||||||||||||||
|
"We don't use fiberglass poles at all. I have broke enough of them, but I've never broke aluminum, and a decent pair of aluminum aren't too heavy. We also wrap a good half inch layer of duct tape just under the grip. (just to be handy if ya need it). And we use carbide tipped baskets, which are a must on ice.
And for times when you need bigger skis for more flotation when crust hasn't quite firmed up we use slightly wider skis (59-51-55).
We drill a hole into the Profil (manual) binding and add a loop of wire or stiff lace for a grab loop. (Works like a mini grab loop on a kayak skirt....pull if you go through the ice).
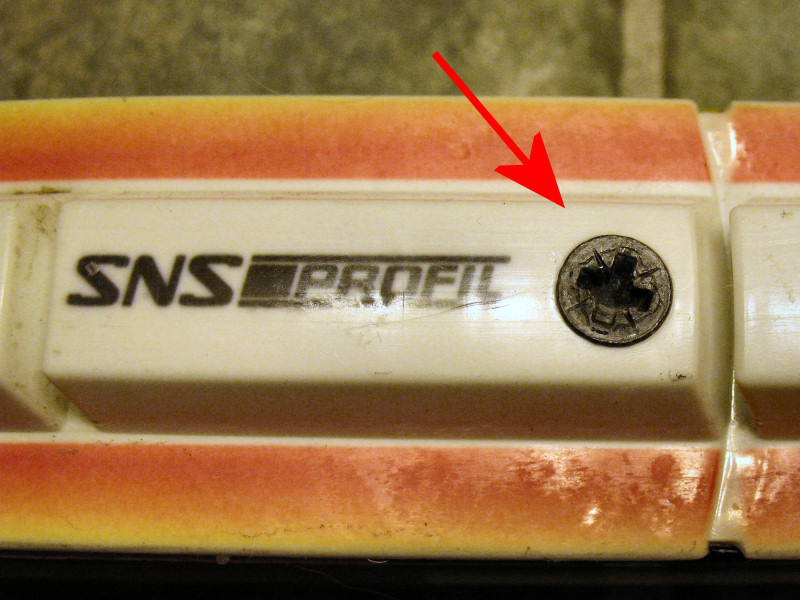
My friend (who likes to modify most things) also adds extra screws to his bindings and I think I will start to copy that as well. I've seen a few binding bases work loose and break. We also use beefy BC bindings for extra peace of mind.
I don't know if you have enjoyed the benefit of bare ice skiing with full metal edge skis, but it has become a favourite way for us to burn many kilometres on day trips. We are starting to get a little following of this sport around here in the early spring. When there is no snow left on the lakes we have a small group that will put on heavier skis 65-55-60 ish and skate across glare ice. There can be a whole new list of accessories to talk about with this sport (head gear,knee elbow pads etc) and we tend to outfit these skis with 3 pin or beefier BC binding /boot combinations. This is all pretty much blasphemous to your teachings but I've put on over 100km during daylight hours in a day on bare ice (and I'm not a racer in any sense of the word). This would be too tough to do on snow. Ice skiing is fast and you can cover a lot of lakes. Last year we had a local dealer bring in a few skis made by Fischer that were called "steel lights" (47-44-46) and were much like a race/combi skis with full metal edges. The bases are shitty for snow, but they work pretty good on bare ice and are much lighter then the "light" backcountry gear.
The dealer told us Fischer only sold 18 of them in North America last year..... and 13 of them were to our club!" |
|||||||||||||||||||||||||||||||
|
|
|||||||||||||||||||||||||||||||
|
Here is a good tip from Cory Smith of Anchorage, AK: "One other thing I keep in my emergency gear/first aid kit: a few small plastic bags. I like the ones that sandwiches come in at Subway. I've used them for a few different things: to put on over my dry socks after my boot has gotten soaked, or to cut open and put under my jacket, pants, or hat in really bitter wind, or stuff it with an extra shirt and it makes decent pillow to sit on for lunch. Its not perfect for any of these things, but it works and it takes up almost no space or weight. Any extra waterproof/windproof material is bound to come in handy at some point." |
|||||||||||||||||||||||||||||||
|
"The only recent backcountry ski trick that I have had to use frequently this winter that I didn't see mentioned on your site is removing ice from my bindings. I now always carry a mini bottle of lock de-icer. It works well when boots are stuck on the skis or the binding is locked up. I suppose this isn't as much of a problem outside of the interior where temps are a bit warmer." |
|||||||||||||||||||||||||||||||
|
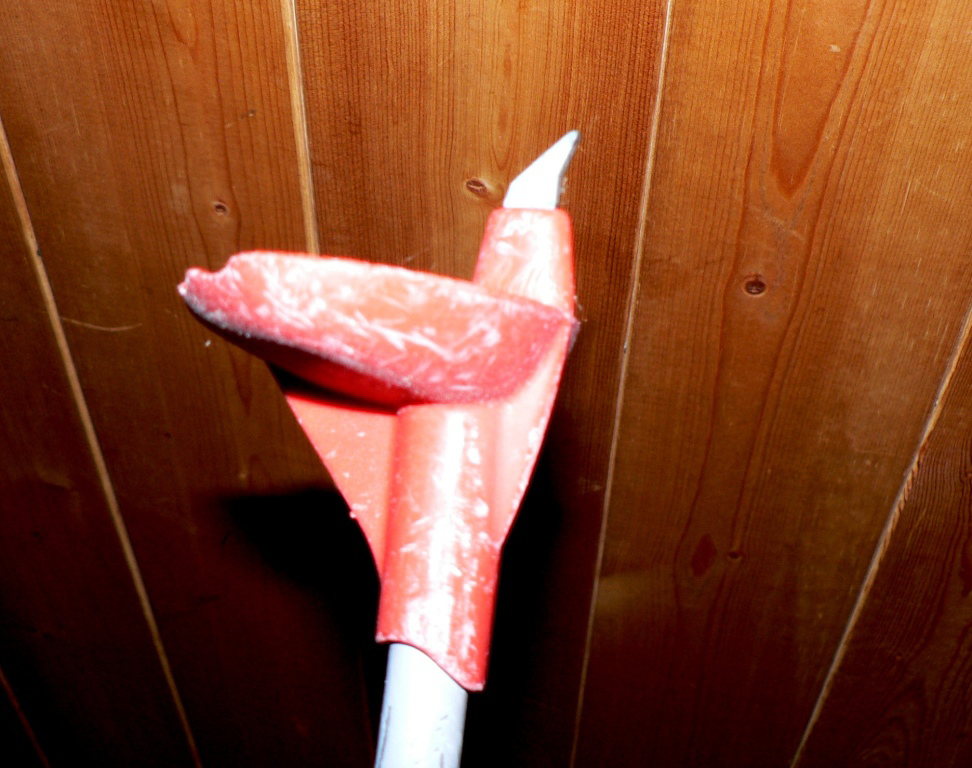
"I kept the unused portion of a climbing skin that I cut off when I fitted the skins to my backcountry downhill skis. It is about 30 cm long. I then cut it in half up the middle and each strip fits perfectly onto the wax pocket of my combi skiis. When I adhere them to the bottom I use hockey tape in the front to keep them from peeling back. I use them when the climbs are really steep and brushy, the snow too deep etc. Then rip them off when I want to skate ski. Works great - bomber kick, decent but not great glide, and no Wax!" |
|||||||||||||||||||||||||||||||
| Alaska Backcountry XC Skiing | |||||||||||||||||||||||||||||||